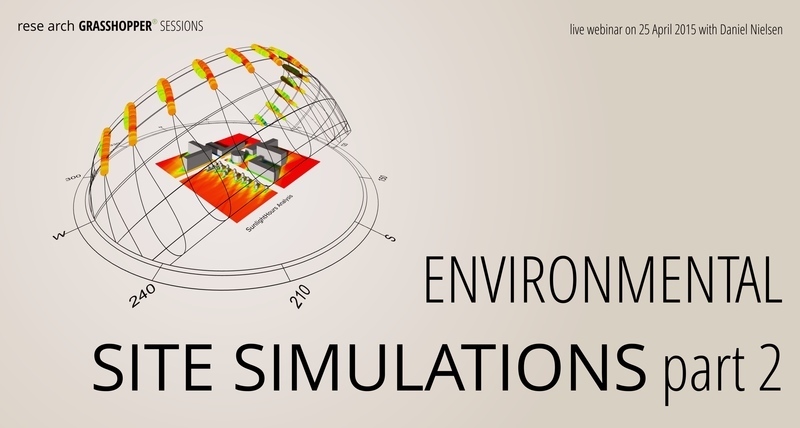
An outdoor simulations session
User Level: Basic to Advanced
Duration: 3 hours
——————-
_STEP 0 GETTING STARTED
0.1 Webinar introduction
0.2 Short refresh of Ladybug for Grasshopper (for Rhino)
0.3 Short refresh of Environmental Design Analysis – process and methodology
_STEP 1 CLIMATE ANALYSIS (NO MODEL)
1.1 Finding and importing weather data file
1.2 Sun Path
_STEP 2 A ANALYSIS OF EXISTING URBAN SPACES (WITH MODEL)
2a.0 Short repetition to Analysis of existing Urban Spaces
2a.1 Short repetition of importing Context models from Rhino
2a.2 Sunlight Hours
2a.3 Sunlight Hours Combined
2a.4 Visibility / View Analysis
_STEP 2 B ANALYSIS OF NEW URBAN SPACES / DEVELOPMENT (WITH MODEL)
2b.0 Short repetition to Analysis of new Urban Spaces
2b.1 Short repetition of importing new Urban Buildings and/or Elements from Rhino
2b.2 Parametric Grasshopper models
2b.3 Sunlight Hours
2b.4 Sunlight Hours Combined
2b.5 Visibility / View Analysis
_STEP 3A ANALYSIS OF EXISTING BUILDINGS (WITH MODEL)
3a.0 Introduction to Analysis of existing Buildings
3a.1 Radiation on exterior facades
_STEP 3B ANALYSIS OF NEW CONTEXTUAL BUILDING CONCEPTS (WITH MODEL)
3b.0 Introduction to Analysis of new contextual Building Concepts
3b.1 Radiation on exterior facades
3b.2 Simple orientation study based on Radiation
3b.3 Simple orientation study based on Sunlight Hours in relation to Urban Spaces
3b.4 Simple orientation study based on Visibility in relation to Urban Spaces
3b.5 Simple orientation study based on Visibility of the building
3b.6 Short note about parametric studies with Galapagos and Octopus
——————-
DANIEL NIELSEN
The Danish architect Daniel Nielsen has a broad experience with Architectural Sustainability and the integration of parametric 3D modeling and simulation tools into the process. He have worked on projects at various scales – from buildings to planning, and have been involved in research and education programs at The Royal Danish Academy of Fine Arts and Technical University of Denmark.
——————-
WEBINARS
The rese arch Grasshopper® sessions are unique for their thorough explanation of all the features, which creates a sound foundation for your further individual development or direct use in the practice. The webinars are divided into four groups: Essential, Advanced, Iterative and Architectural. If you are a Rhinoceros 3D or Grasshopper® newcomer, you are advised to take all the Essential sessions before proceeding to the next level. If none of the proposed topics suit your needs or if you require special treatment, you can request a custom-tailored 1on1 session. All sessions are held entirely in English.
The webinars are series of on-line live courses for people all over the world. The tutor broadcasts the screen of his computer along with his voice to the connected spectators who can ask questions and comment in real time. This makes webinars similar to live workshops and superior to tutorials.
——————-
INSTALLATION INSTRUCTIONS FOR 2019
——————-
LADYBUG
If you have an old version of LB+HB, download the file here (http://hydrashare.github.io/hydra/viewer?owner=mostaphaRoudsari&fork=hydra_1&id=Remove_Ladybug_and_Honeybee) and open it in Grasshopper to remove your old Ladybug and Honeybee version otherwise download the latest version of Ladybug + Honeybee from Food4Rhino (http://www.food4rhino.com/app/ladybug-tools) and follow steps below.
Make sure that you have a working copy of both Rhino and Grasshopper installed.
Open Rhino and type “Grasshopper” into the command line (without quotations). Wait for grasshopper to load.
[ONLY FOR RHINO 5] Install GHPython 0.6.0.3 by downloading the file here (http://www.food4rhino.com/app/ghpython) and drag the .gha file onto the Grasshopper canvas.
Select and drag all of the userObject files (downloaded from Food4Rhino) onto your Grasshopper canvas. You should see Ladybug and Honeybee appear as tabs on the grasshopper tool bar.
Restart Rhino and Grasshopper. You now have a fully-functioning Ladybug. For Honeybee, continue to the following:
HONEYBEE
Install Radiance to C:\Radiance by downloading it from this link (https://github.com/NREL/Radiance/releases/tag/5.1.0) and running the exe. NOTE: The default installation path for Radiance is set to C:\Program Files(x86)\Radiance which should be modified to C:\Radiance.
Install Daysim 4.0 for Windows to C:\DAYSIM by downloading it at this link (http://daysim.ning.com/page/download) and running the exe.
Install the Latest OpenStudio by downloading and running the .exe file from this link (https://github.com/NREL/OpenStudio/releases/tag/v2.5.0).
Install Berkeley Therm 7.6 by downloading and running the .exe file from this link (https://windows.lbl.gov/tools/therm/software-download). Note that Honeybee does not work with the newest, 7.7 version (!), so download 7.6 instead (toward the bottom of the page).
Finally, copy falsecolor2.exe (https://github.com/mostaphaRoudsari/honeybee/blob/master/resources/falsecolor2.exe?raw=true) to C:\Radiance\bin
——————-
ORIGINAL INSTALLATION INSTRUCTIONS
——————-
BEFORE THE WEBINAR
Instructions for Installing Ladybug + Honeybee and other needed software
(Follow steps 0-4 for basic functionality and 0-10 for full functionality)
0 If you have an old version of LB+HB, download this file and open it in Grasshopper to remove your old Ladybug and Honeybee version. https://app.box.com/s/ds96em9l6stxpcw8kgtf
1 Make sure you have a copy of both Rhino and Grasshopper installed that is working and up to date
2 Open Rhino and type “Grasshopper” into the command line (without quotations) and wait for grasshopper to load.
3 Install GHPython 0.6.0.3 by downloading the file from this link and drag the .gha file onto the Grasshopper canvas. http://www.food4rhino.com/project/ghpython?ufh
4 Download Ladybug and Honeybee from food4rhino. You need to have an account to download, create one or use the one you have and login. http://www.food4rhino.com/project/ladybug-honeybee
5 Select all and drag and drop all of the userObject files onto your Grasshopper canvas. You should see Ladybug and Honeybee appear as tabs in the grasshopper tool bar.
6 Restart Rhino and Grasshopper. You now have a fully-functioning Ladybug. Install Honeybee, follow the below steps
7 Install Radiance to C:\Radiance by download it from this link and run the exe file.
https://github.com/NREL/Radiance/releases/download/4.2.2/radiance-4.2.2-win32.exe
8 Install Daysim 4.0 for Windows to C:\DAYSIM by downloading it at this link and run the exe file. http://daysim.ning.com/page/download
9 Install EnergyPlus 8.1 to C:\EnergyPlusV8-1-0 by going to the DOE website. It is needed to have an account, create one or login and select 8.1.0.009 either 32 or 64 bit. After download run the exe file. http://apps1.eere.energy.gov/buildings/energyplus/energyPlus_download.cfm?previous
10 Download and Copy (no installation is needed only copy-paste the files) falsecolor2.exe and evalglare.exe to C:\Radiance\bin
http://pyrat.googlecode.com/files/falsecolor2.exe
http://www.ise.fraunhofer.de/en/downloads-englisch/software/evalglare_windows.zip/at_download/file
You now have a fully-working version of ladybug and honeybee
FURTHER DOWNLOADS / INSTALLATIONS
11 Download this plugin for image visualization, and place the .gha file in the below folder path, the username is probably your login name.
http://www.grasshopper3d.com/forum/attachment/download?id=2985220%3AUploadedFile%3A1101388
C:\Users\****YOUR_USERNAME****\AppData\Roaming\Grasshopper\Libraries
Environmental: ENVIRONMENTAL SITE SIMULATIONS part 2 with Daniel Nielsen

Be the first to add a review.
Please, login to leave a review

